
Pulse pouring is one of those small changes that can seriously improve your pour over coffee. It’s a method used by pros and everyday coffee lovers to get brighter flavors, more sweetness, and a smoother cup. If you’ve watched baristas at specialty cafés or seen coffee competition videos, you might notice them pouring water in intervals instead of a slow, steady stream. That’s pulse pouring in action, and it’s easier to do at home than you might think.
Poor technique or just dumping all the water at once can make coffee taste flat, muddy, or bitter. Pulse pouring breaks up the water into smaller “pulses” so every bit of ground coffee gets a chance to extract at its best. If you want a repeatable, lighter, café-style brew without getting too complicated, this is worth checking out. Check out the 10 most common mistakes in pour over coffee for more information.
Below, I’ll break down how pulse pouring works, why it makes a difference, and the steps you can follow to use this technique with your favorite pour over setup. Whether you’re just starting out or looking to take your coffee up a notch, you’ll find practical tips for dialing in your next brew.
The Basics: What Is Pulse Pouring?
Pulse pouring is a pour over technique where you add water in several small pours, or “pulses”, instead of one constant pour. Each pulse is usually between 40 and 80 grams of water, and you wait a bit between each pulse before adding more. This helps control extraction, lets the grounds settle, and keeps your brew more consistent from cup to cup.
How Pulse Pouring Changes Coffee Flavor
- Pulse pouring gives you more control over how the water interacts with your coffee grounds. Smaller pours keep the coffee bed from being constantly agitated, stopping over-extraction and muddy flavors. More on that in why your pour over coffee tastes muddy.
- Each pause between pulses helps the water drain a little, keeping the brew from getting too “stalled out” and overcooked near the bottom.
- If you struggle with bitterness or muddiness, this technique can help create brighter, more balanced cups, especially with lighter roasts.
Why Use Pulse Pouring?
I started using pulse pouring after noticing my regular pour overs were sometimes sour or bitter, even with fresh beans. Pulse pouring made those flavors more predictable and easy to fix. Here’s why this method is super useful for pour over:
- Consistency: More even extraction and repeatable results, even if you’re new to brewing.
- Flavor Clarity: Helps separate out those delicate, sweet, and juicy flavors instead of mixing everything together.
- Control: Lets you adjust on the fly for different beans, grind sizes, or brewers.
If you’ve ever had trouble with collapsed coffee beds (that “crater” in the middle at the end of brewing) or uneven pours, pulse pouring helps solve that.
Getting Ready: What You’ll Need
- Pour over dripper (like a Hario V60, Kalita Wave, Origami, or similar)
- Gooseneck kettle (makes precision pouring way easier, but a regular kettle will work in a pinch)
- Scale (helps measure water pulses and total brew weight)
- Freshly ground coffee beans (medium grind works best for most pour overs)
- Filtered water
Having a timer is pretty handy too, especially while you’re getting used to the timing and amounts.
How Pulse Pouring Works (Step-by-Step)
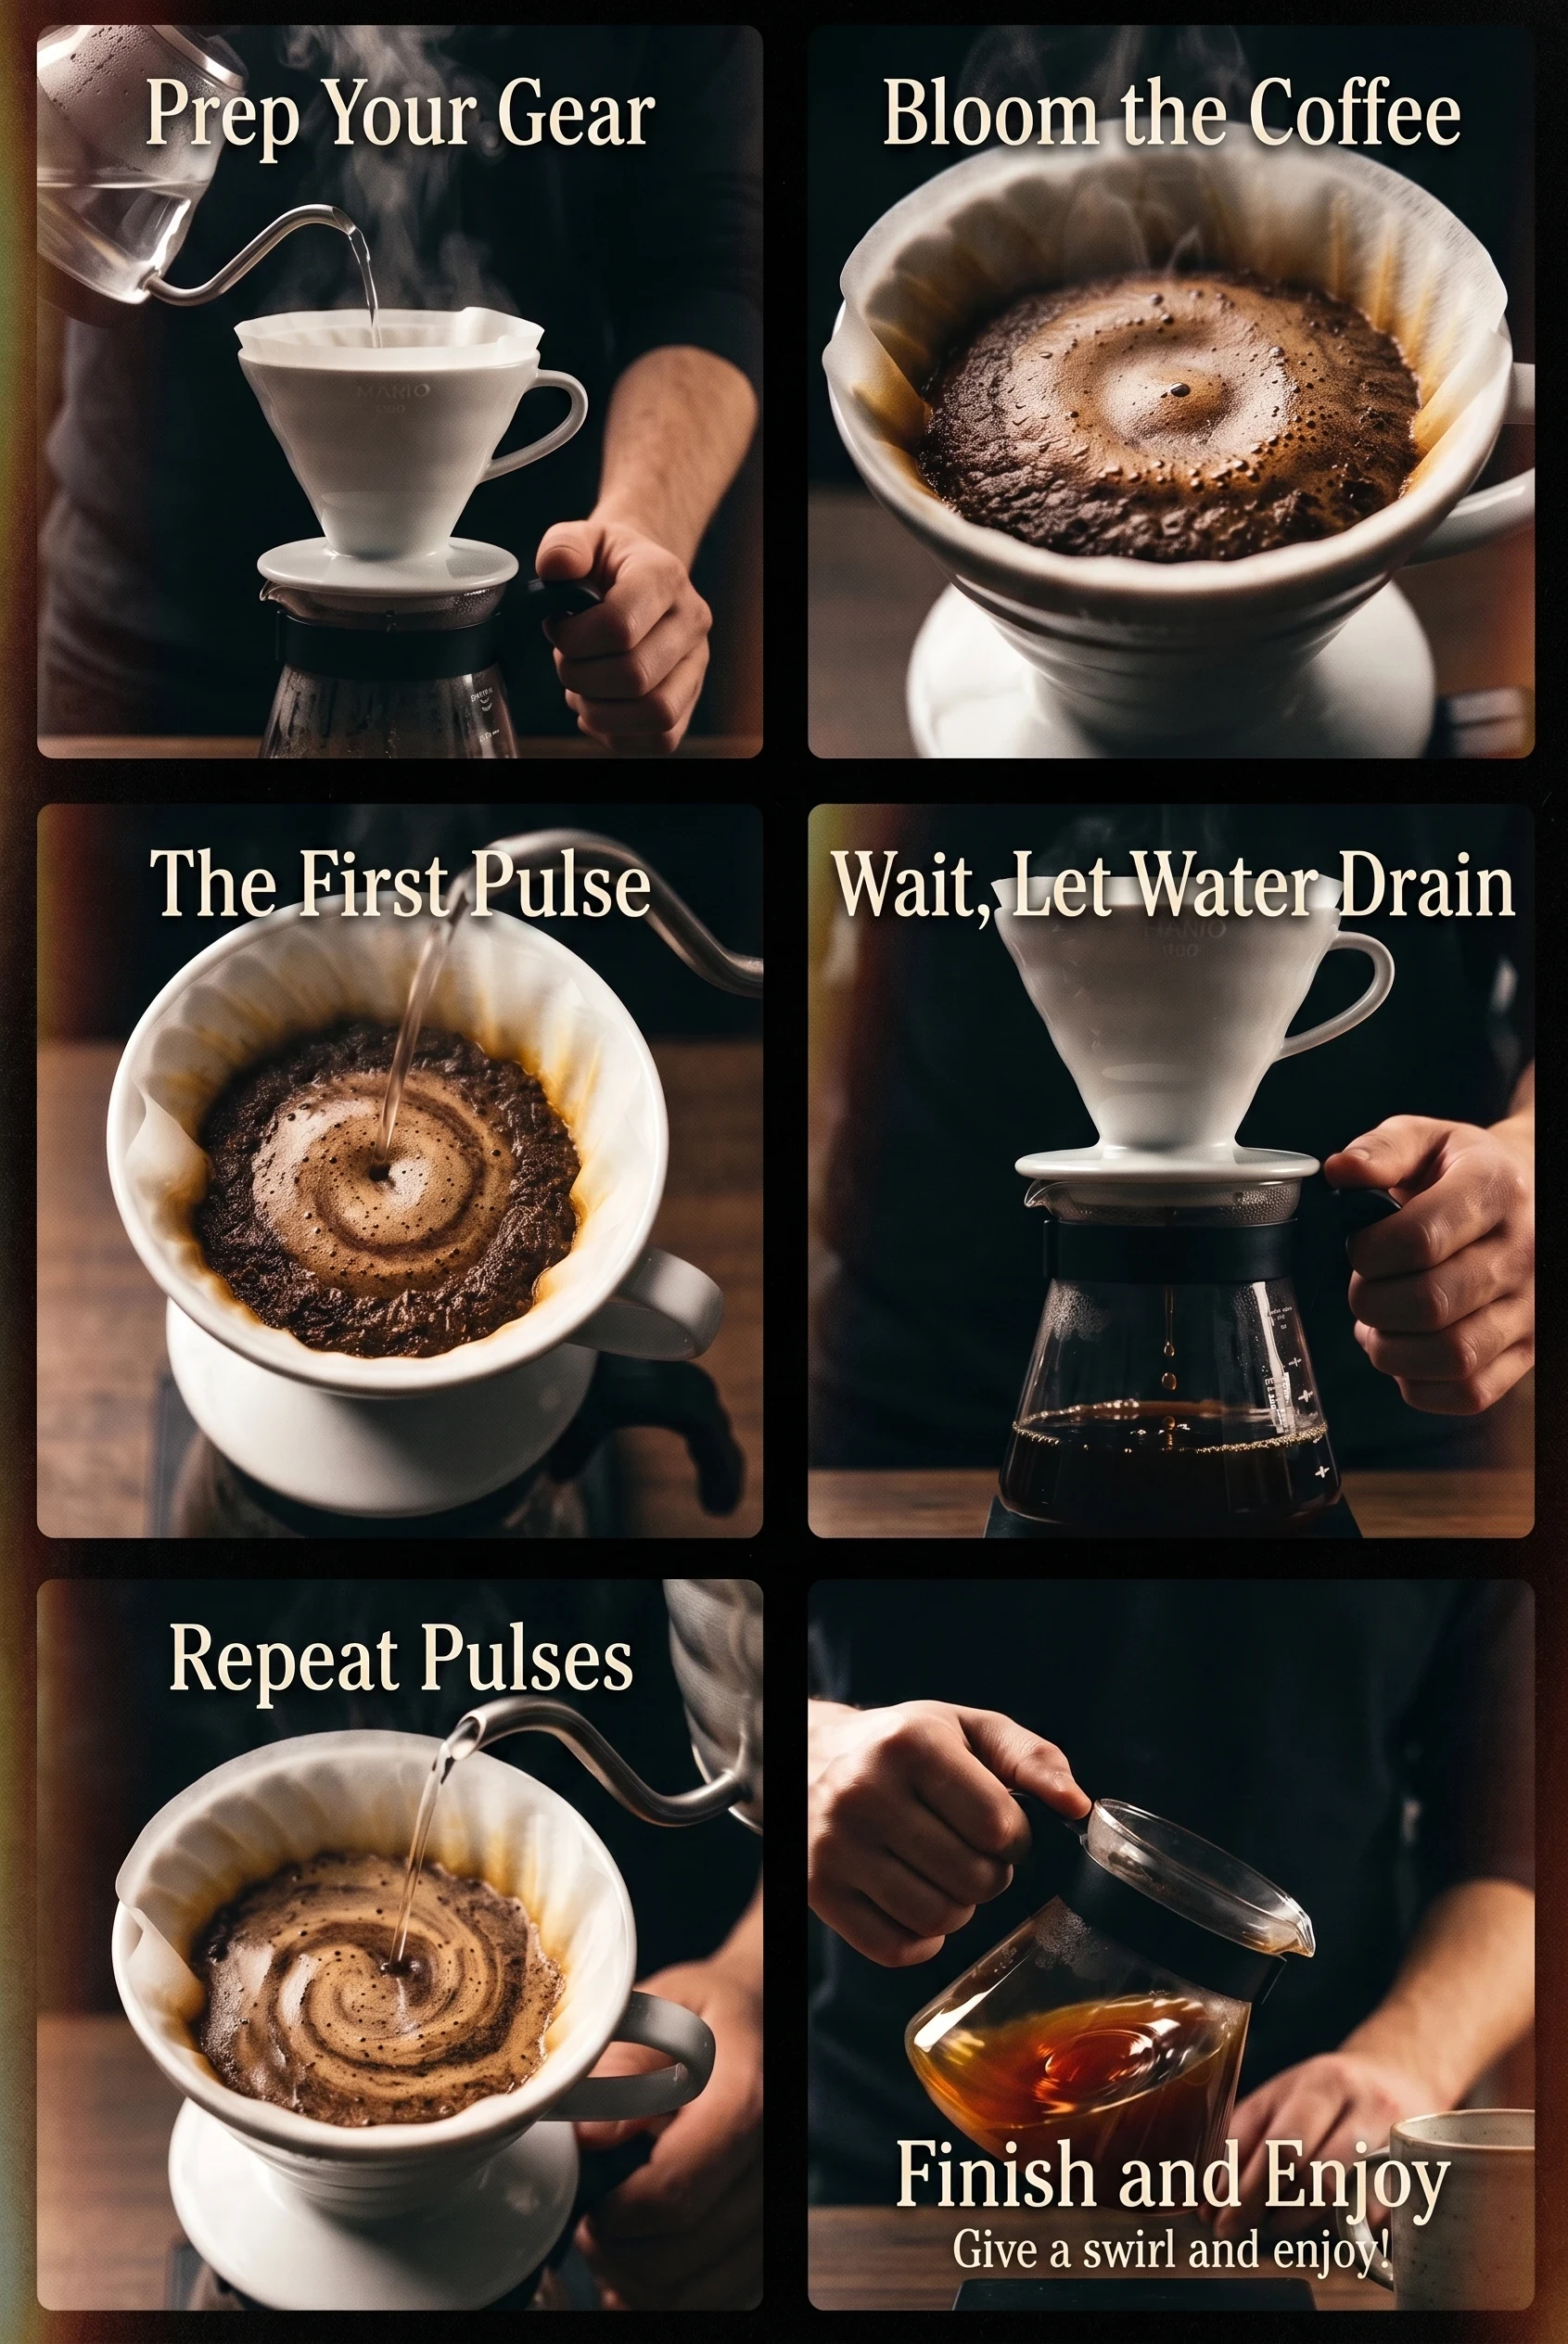
1. Prep Your Gear
Place your filter in your dripper, rinse with hot water, and dump the rinse water. Add your ground coffee (usually 15 to 20 grams for a single cup) and gently shake to level the bed.
2. Bloom the Coffee
- Start your timer. Pour about double the coffee weight in water (for example, 30 to 40 grams if using 15 to 20 grams coffee).
- Let it bloom for 30 to 45 seconds. This lets gases escape and helps with even extraction.
3. The First Pulse
Pour your first pulse, typically another 40 to 60 grams. Start pouring in small, controlled circles from the center outward, instead of splashing at the edges.
4. Wait, Let Water Drain
Wait until the water drips about halfway through the bed or drains almost to the surface. Pauses can be 10 to 30 seconds depending on your brewer and grind size.
5. Repeat Pulses
- Add more pulses in the same amount (40 to 60 grams), keeping each pour gentle and even. Stop pouring if the water line gets too high in the dripper.
- You’ll usually do 3 to 5 pulses for a regular 250 to 350 gram pour over, finishing around the 2:30 to 3:30 minute mark.
6. Finish and Enjoy
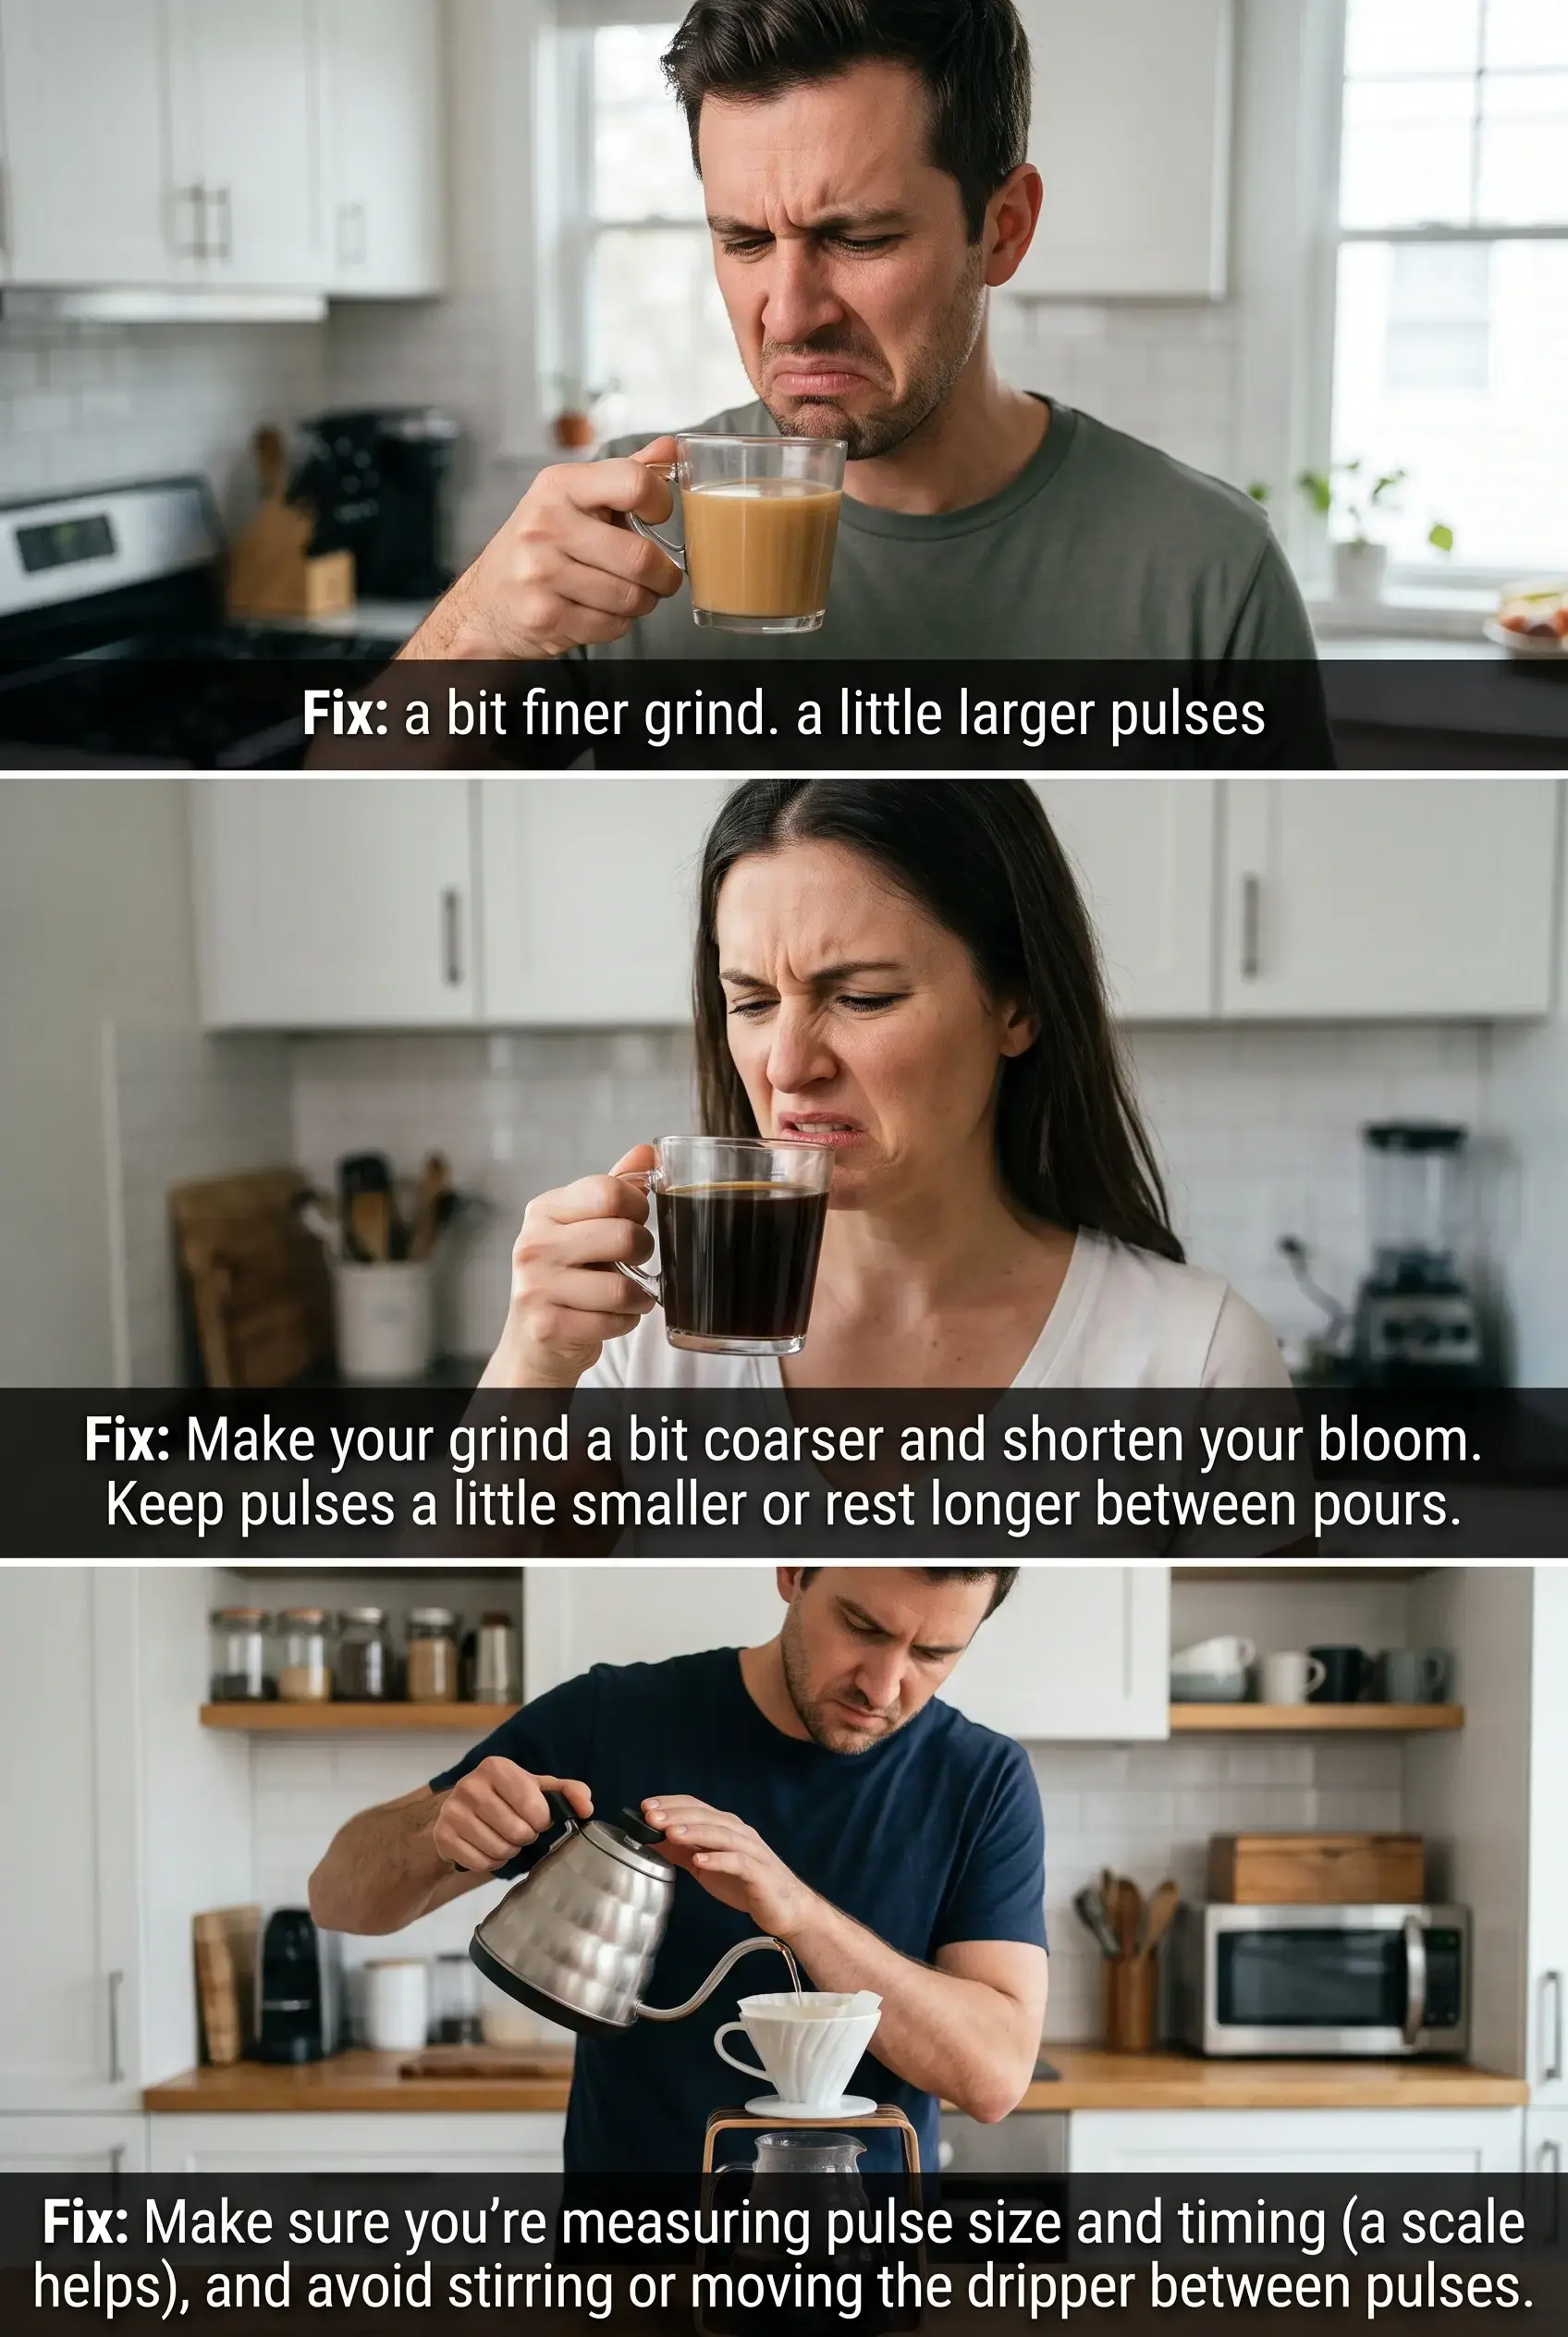
Once all the water has drained, toss the filter, give your coffee a swirl or stir, and taste. If it’s too weak, try a finer grind or adding a pulse. Too strong or harsh? Make pulses smaller or use a coarser grind next time.
Troubleshooting and Tips
Extra Tips
- Stir or swirl the bloom after pouring to saturate grounds (optional, but it helps with evenness).
- Don’t pour directly on the sides of the filter, as this water just runs off instead of extracting coffee.
- If you notice your brew stalling, slow down and pause longer to let the bed drain.
- Try slightly adjusting your pulse volume by 5 to 10 grams to suit your taste. Different coffees sometimes shine with a bit larger or smaller pulses, especially if they’re darker roasts or have a heavier body.
If you want to step up your coffee routine even more, experiment with your water temperature or blooming time. Warmer water can bring out more sweetness, while a longer bloom helps gases escape, especially with very fresh beans.
Pulse Pouring Patterns: Common Variations
- Equal Pulses: Divide your total water by number of pours. For a 300 gram brew with 5 pulses, that’s 60 grams per pulse.
- Decreasing Pulses: Each pulse gets smaller, like: bloom (40 grams), then 70 grams, 60 grams, 50 grams, and so on.
- Custom Timing: Some people pause 10 to 15 seconds between pours; others wait until the bed is nearly dry before the next pulse. Tweak this to taste and how your coffee drains.
- Stacked Pulses: Try doing two pulses quickly one after another, then pausing, to see if your coffee gets a different texture or brightness. This method can add some variety if you want to mix things up with your brew.
Questions & Problems People Usually Have
Is pulse pouring only for experts?
Not at all! While you’ll see it in cafés, it’s easy for anyone with a scale and kettle to do at home. Consistency is what matters, and anyone can do it.
Can I pulse pour without a gooseneck kettle?
A gooseneck gives you the best precision, but you can make it work with a slow pour from a regular kettle. Just go slowly and use a gentle stream. If you really want precise pours, gooseneck kettles are affordable and make things easier, but they aren’t strictly necessary for experimenting at home.
Do I always have to use the same number of pulses?
Nope. It’s fun to experiment. Some coffees taste best with bigger or smaller pulses, or more or less time between each one. Play around and see what you like. Some light roasts come out best with longer gaps between pours, while richer beans can handle more frequent pulses.
Does pulse pouring work with every dripper?
Most flat-bottom and cone-shaped drippers work well with pulse pouring. Some designs, like Kalita or Origami, really shine with this technique because of even extraction, and V60 drippers work great too. Try adjusting your pulses if your coffee drains faster or slower than usual, since every dripper’s flow rate is slightly different.
Next Steps: Dialing In Your Pour Over Game
Getting good at pulse pouring is about practicing and finding what works for you. Try different pulse patterns, change grind size, or time your pours a little differently. A notebook or coffee app helps if you want to keep track of what tastes best with certain beans or brewers.
What to Try On Your Next Brew:
- Pick a favorite coffee, grab your pour over setup, and try pulse pouring for yourself.
- Start with three to five small pulses and time each one with a scale and timer.
- Taste the result and tweak your grind size, pulse size, or pour timing next time. Don’t be afraid to experiment and take some notes. Over a few sessions, you’ll really get a feel for what suits your taste best.
Pulse pouring is a small change, but it can make a big difference in your cup. If you have a favorite tip or want to share how it went, drop a comment below. I’d love to hear how your brews turn out!