Blooming your pour over coffee is one of those simple steps that can easily get overlooked, but it can totally change how your cup tastes. It’s not just for coffee nerds; anyone who’s curious about making better-tasting coffee at home will find that a proper bloom gives you more flavor and a smoother cup. Jumping into what makes blooming matter, why it works, and how you can do it right will make your daily brew more enjoyable with just a bit of extra know-how
How To Bloom Pour Over Coffee for Better Flavor and Even Extraction
What blooming means in pour over brewing
Blooming in pour over coffee just means the first contact between hot water and coffee grounds. You pour a small amount of water over the grounds to “wake them up,” letting gases trapped inside escape. Those bubbles you see? That’s mostly carbon dioxide fizzing up, and that’s the bloom in action.
This opening stage unlocks a lot of flavor potential and sets up the whole extraction process. Skipping it or rushing through can lead to a cup that tastes dull or unbalanced. So paying attention to how you bloom really makes a difference, even with the exact same gear and beans you use every day.
Why the bloom stage matters more than many beginners realize
When you see tutorials showing a dramatic, bubbly bloom, that’s not just for looks. The bloom stage is all about getting rid of stale CO2, which can stop water from getting to all those flavorful coffee particles. If you skip the bloom or do it half-heartedly, you might end up with channeling, uneven extraction, and flavors that don’t really pop.
It can seem like a fancy step, but blooming does a lot of the heavy lifting in making sure your coffee tastes sweet, not sour or bitter.
Why Blooming Pour Over Coffee Improves Flavor
How trapped gas can disrupt extraction
Freshly roasted coffee beans have a bunch of carbon dioxide trapped inside from the roasting process. When you grind and pour water over those grounds, the CO2 comes rushing out. This trapped gas can create bubbles that actually keep water from soaking all the grounds. That means your brew isn’t getting everything it could out of each coffee particle.
If CO2 gets left in the grounds, it can mess with the flavors too. Instead of letting all the good stuff extract, the gas pushes water away and sometimes adds a sharp, almost carbonic taste. That’s why getting rid of that gas right at the start is really important.
Why blooming helps water contact the grounds more evenly
The bloom acts a bit like prepping the grounds for what’s coming. Once you’ve released most of that trapped gas, water can reach every nook and cranny in the coffee bed. This way, there’s less risk of dry pockets or uneven brewing, and the extraction is more balanced. That evenness goes straight into the flavor of your cup, helping you avoid weird sour notes or random bitterness.

How a better bloom can lead to a sweeter, cleaner cup
The best pour over coffees usually have a natural sweetness and crisp, clean flavors. A proper bloom helps to bring those out. By making sure all the grounds interact with water right from the start, you’re giving yourself a better chance at getting those floral, fruity, or nutty notes your coffee is supposed to have. It’s a small tweak, but it’s one that keeps your cup tasting as good as it possibly can.
If you’re looking to make each cup the best it can be, check out the how to perfect your pour over coffee guide
What You Need Before You Bloom Pour Over Coffee
Fresh coffee beans make blooming more effective
Freshly roasted coffee is loaded with CO2, and that means it’ll bloom more actively than coffee that’s sat around for a few months. Only really fresh beans will give you that dramatic, puffy bloom. If your coffee is a little older, you’ll still want to bloom it, but don’t expect the same showy bubbles. Always buy whole beans and grind them just before brewing to lock in all the flavor and gas you want to release during blooming.
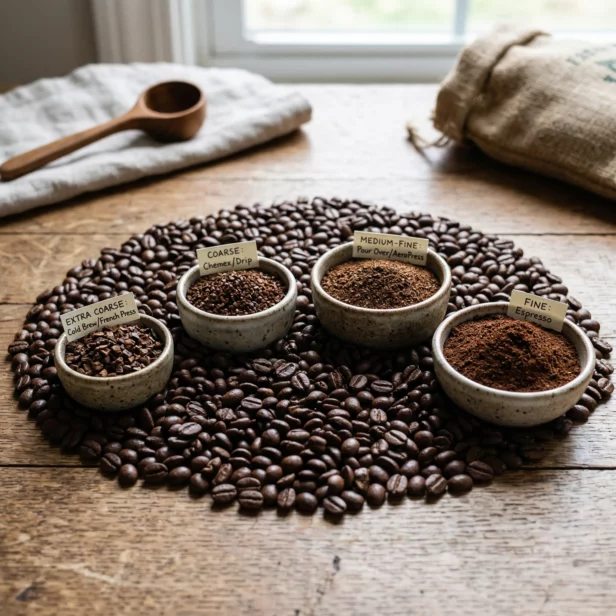
Grind size, water temperature, and brew ratio all play a role
You don’t have to get overly technical, but your grind size, water temperature, and how much coffee you’re using all matter. Medium grind works well for most pour over methods, but if your coffee brews too slow or too fast, tweak the size. Water right off the boil, around 195 to 205°F (90 to 96°C), gets the gases out quickly. For the ratio, a good starting point is 1 gram of coffee to 15 to 17 grams of water.
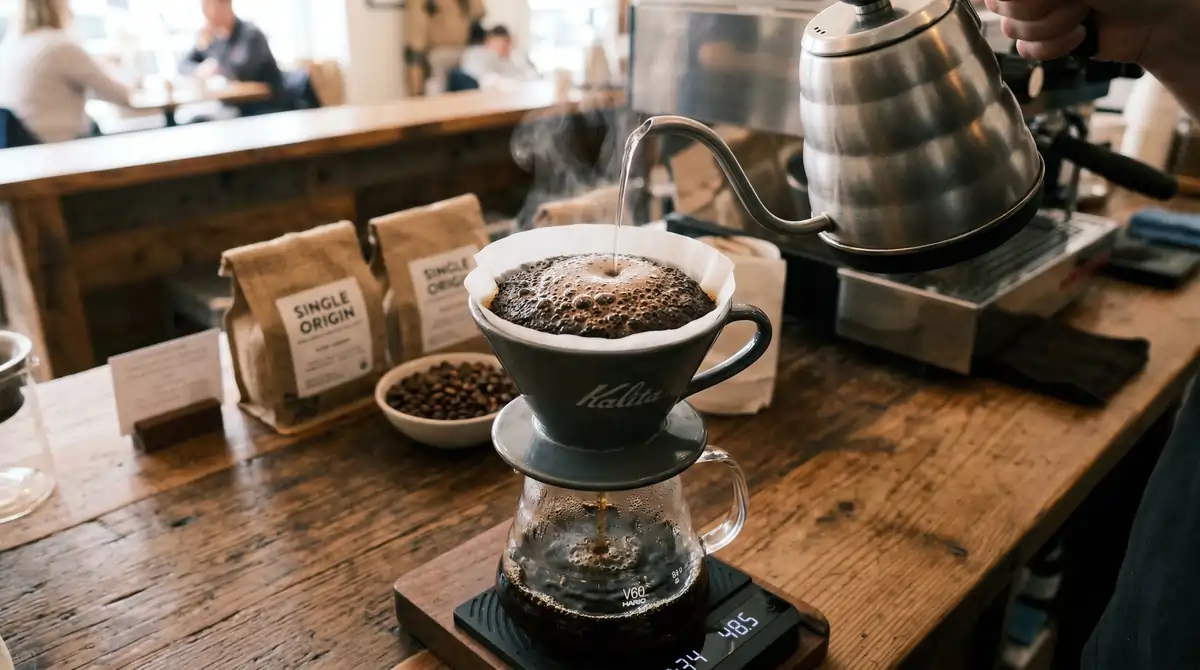
Why your dripper and filter setup matter too
Your dripper and filter can affect how the bloom behaves. Coneshaped drippers like the Hario V60 encourage water to flow downward evenly, while flatbottomed drippers like the Kalita Wave spread water more slowly. Fine, thick filters (such as Chemex) can hold water on the grounds longer, helping bloom gases break free. Just make sure your filter is snug and you’ve rinsed it, so no papery taste messes with your coffee.
Check this out for more information on the best pour over brewing methods
How To Bloom Pour Over Coffee Step by Step
Rinse the filter and prepare your brewer
Start by setting up your dripper and filter. Place the filter into your brewer and rinse it with hot water. This step is easy to skip, but it removes any papery residue and preheats your dripper. Dump out the rinse water before you add your coffee grounds.
Add the coffee grounds and level the bed
Pour your freshly ground coffee into the filter, then shake or tap the dripper gently to even out the bed. This helps the bloom water hit every part of the coffee evenly.
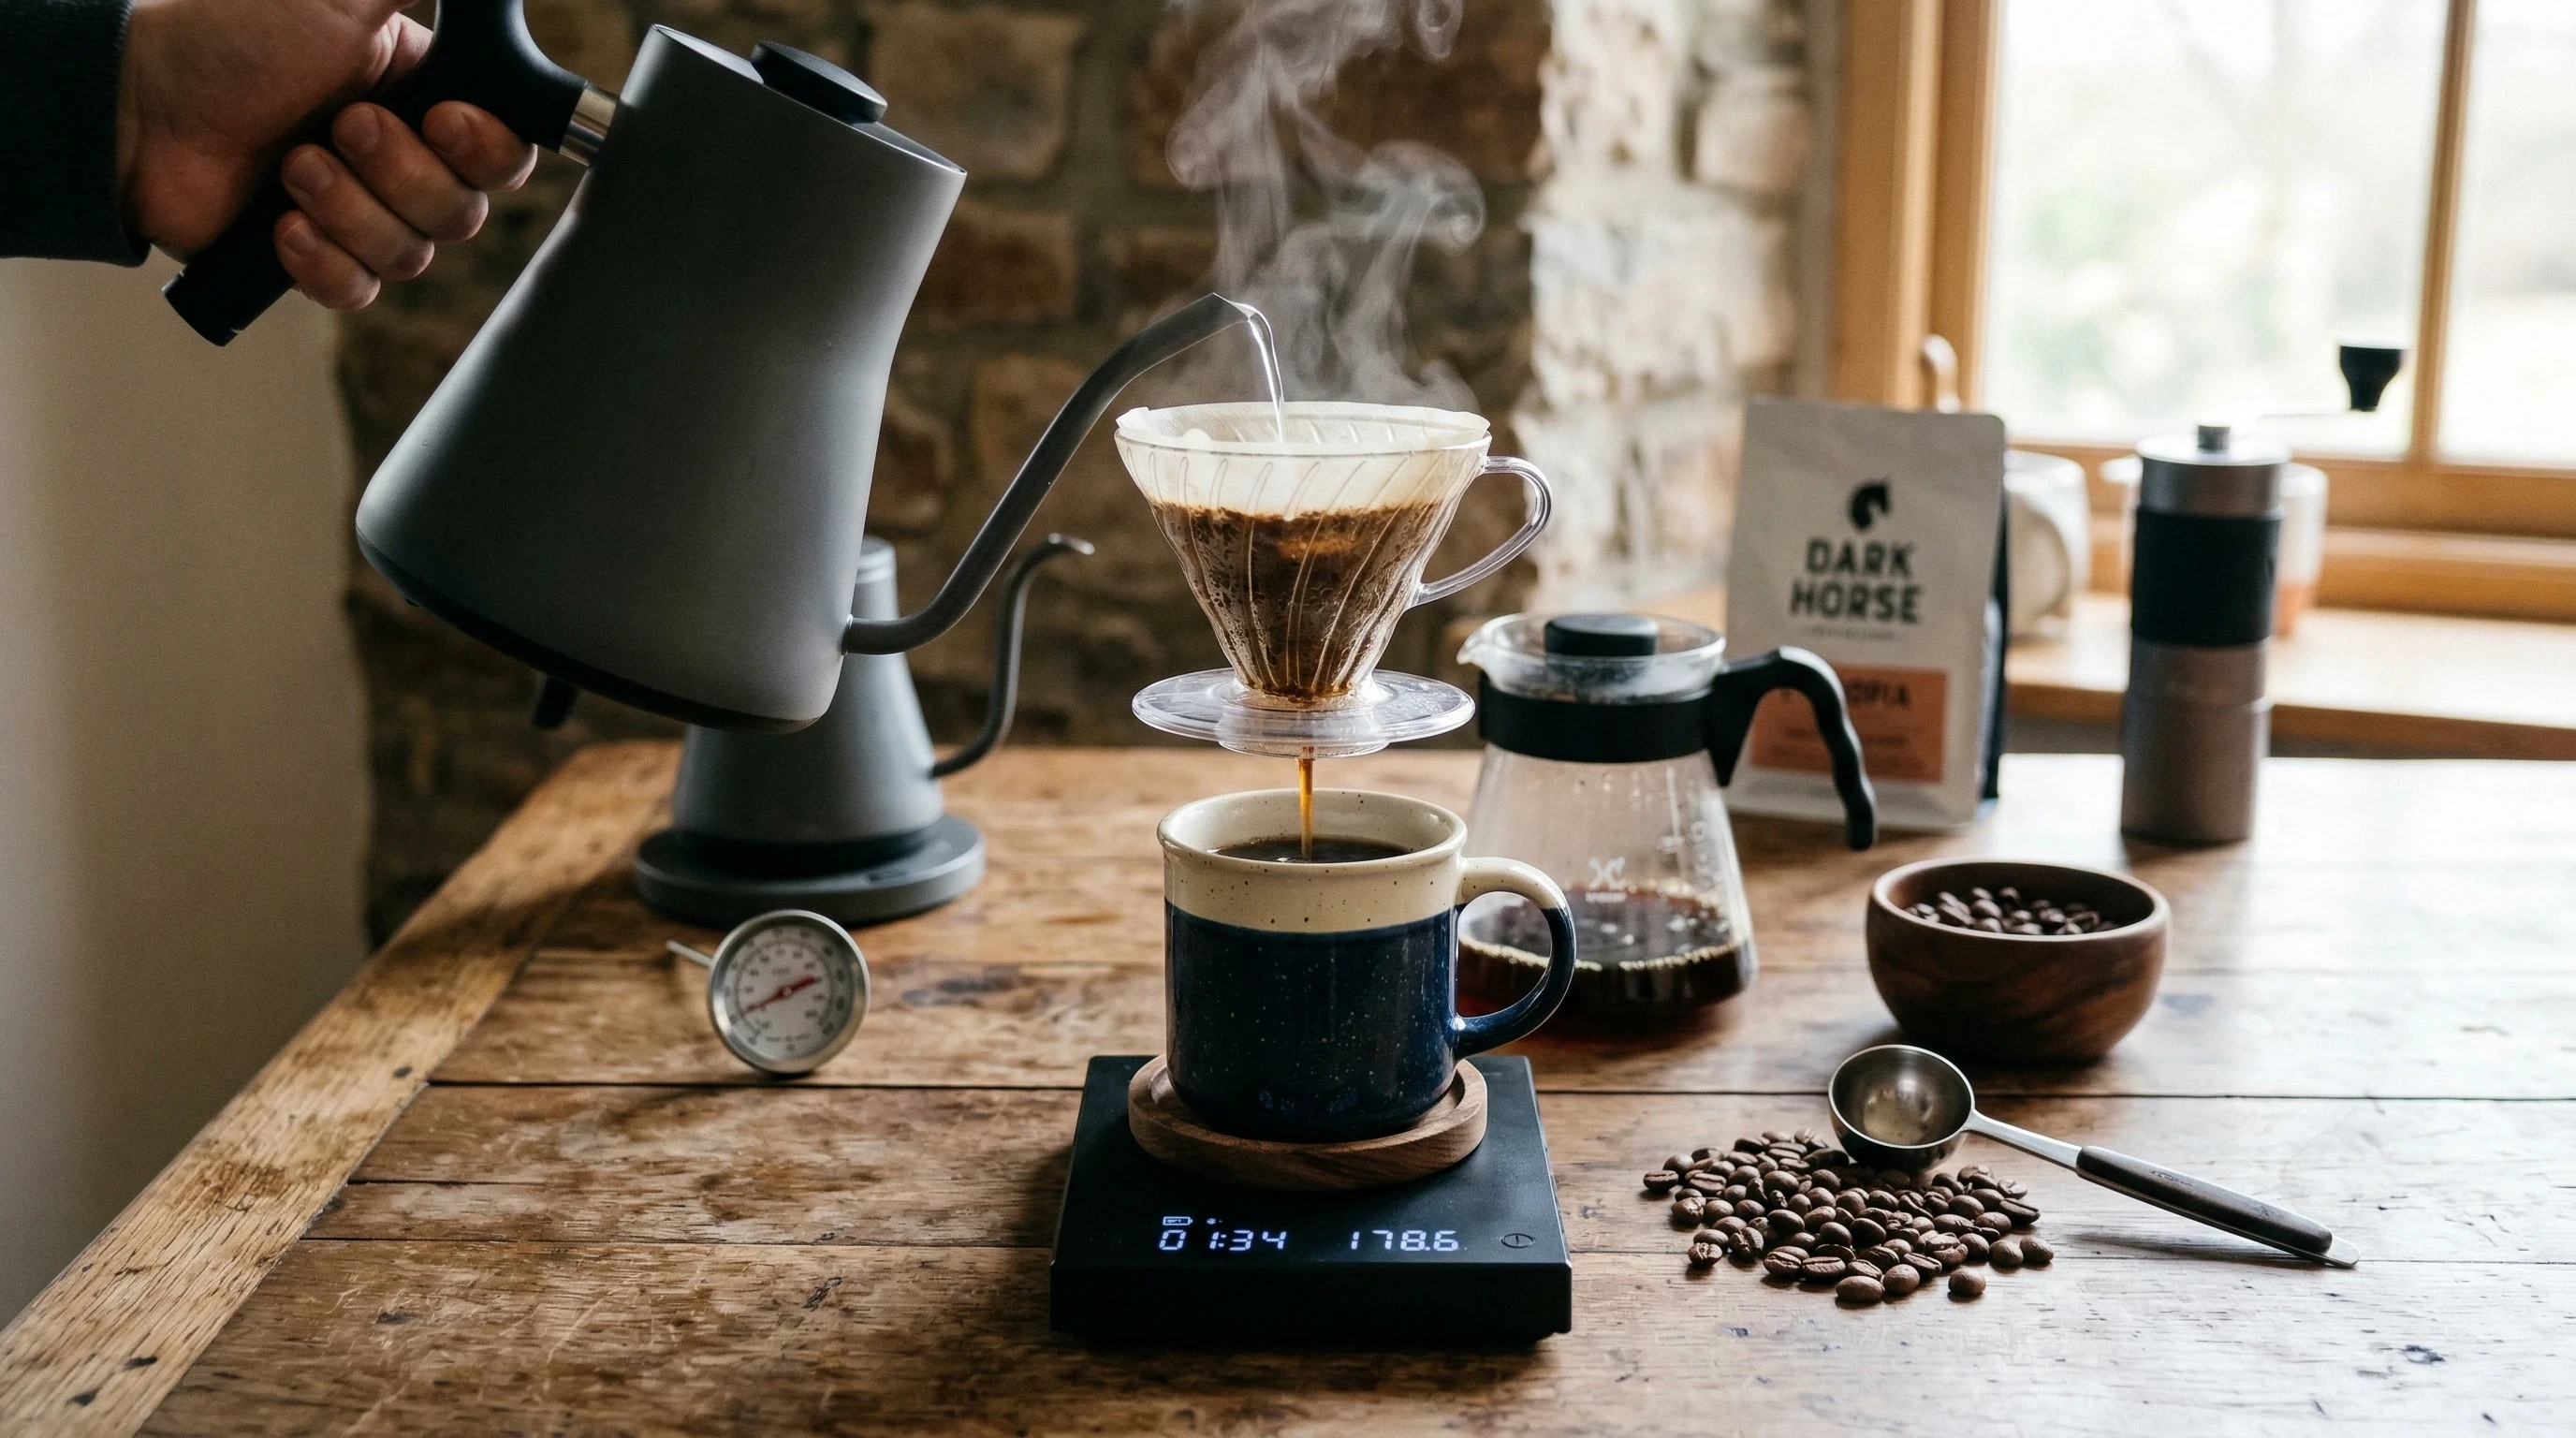
Pour enough water to fully saturate the grounds
Start a timer and pour just enough hot water (again, about 195 to 205°F) to soak all the coffee grounds. The amount is usually about twice the weight of your coffee dose. For example, if you’re brewing with 20g of coffee, pour around 40g of water for the bloom stage. Pour slowly and in circles from the center outward, making sure you don’t leave any dry spots.
Let the coffee bloom before continuing the main pour
Once all the grounds are soaked, pause and let the bloom work its magic. You’ll see the grounds rise, bubble, and maybe even expand like a little dome in your dripper. This takes 30 to 45 seconds, but you’ll be able to see when most bubbling stops.
Resume pouring with control for even extraction
After the bloom has fizzled down, continue your main pour. Pour hot water in slow, steady circles, keeping it gentle so the coffee bed stays even. Depending on your brewer, you might pour in pulses or in one continuous stream. Aim for a total brew time, from first pour to last drip, of about 3 to 4 minutes, adjusting as needed to dial in the taste you like.
Trying to find out how to really bring out the best flavors? Take a peek at How to enhance the flavors of pour over coffee
How Much Water To Use To Bloom Pour Over Coffee
A simple bloom water starting point
For most pour over methods, a great rule is to use about twice your dose weight in water for blooming. So, if you’re using 20g of coffee, start with 40g of water during the bloom. This is enough to get all the grounds wet but not so much that you wash everything into the carafe early.
Why the right amount depends on your coffee dose
Larger brews will naturally need more water to get everything saturated. If you’re doing single cup pour overs with 12 to 15g, 25 to 30g of water will do the trick. Always focus on getting every bit of the grounds wet in this stage, since dry spots are no good if you want all that flavor released evenly.
How to tell when all the grounds are properly saturated
Take a look at the top of the coffee bed right after you pour. It should look swollen and glossy, with no visible dry patches along the filter walls or surface. If you see dry spots, add a little water gently until everything’s soaked.
How Long To Bloom Pour Over Coffee
A common bloom time that works for most brews
About 30 to 45 seconds is a good range for most home pour over setups. This gives the bloom time to finish releasing trapped gases before you finish the brew. Set a timer if you want to be precise, but with enough practice, you’ll just watch the bubbles die down to know you’re ready.
When fresher coffee may need a slightly longer bloom
If your beans are super fresh, like roasted within the past week, they’ll probably have more CO2 and need closer to 45 or 50 seconds to finish blooming. Beans that are a couple weeks old might be good with just 25 to 30 seconds. Watch what the grounds are doing and use that as your main guide.
Signs your bloom time needs adjusting
If your coffee is still bubbling aggressively when you pour the next batch of water, you probably need a longer bloom. If you wait but see very little fizz or swelling, your beans might be less fresh, and a shorter bloom is fine. Noticing a lot of sourness, muddiness, or lack of sweetness in the cup might also mean your bloom time needs an adjustment.
Common Mistakes When You Bloom Pour Over Coffee

Using too little water during the bloom
Pouring too little water won’t saturate all the grounds, leaving some gas trapped. That leads to uneven extraction and less flavor in your finished cup. A small gooseneck kettle makes it easy to cover the grounds gently but thoroughly.
Pouring unevenly and leaving dry pockets
If you only pour in the center or don’t swirl the water gently, you can leave certain areas of the bed dry. This creates channels that let water run straight through without picking up all the good stuff. Always pour in slow spirals or back and forth motions and watch for dry edges.
Letting the bloom go too short or too long
Rushing the bloom stage means you’ll still have CO2 in the bed; dragging it out too long means your coffee cools down and loses some extraction power. A solid bloom time is quick and controlled without any dawdling or distractions.
Expecting old coffee to bloom like fresh beans
If you use beans that are months old, don’t expect a dramatic bloom. You’ll likely see just a little swelling and a few bubbles. That doesn’t mean you should skip the bloom step, but it’s good to adjust your expectations if your coffee is on the older side.
How To Tell If You Are Blooming Pour Over Coffee Correctly
What an active bloom should look like
A good bloom will swell up, get bumpy, and form some visible bubbles on top of the coffee bed. The bed should rise and stay puffed up for a short bit, then gently settle back down. You might see a bit of steam or a freshroast smell as gases escape.
What weak bubbling or uneven swelling can mean
If the bloom is patchy, rising more on one side, or with barely any activity, you might have poured unevenly or are working with beans that are past their prime. Spotty blooms can also mean your grind size is off, or the grounds didn’t get fully saturated.
How bloom behavior changes with roast date and freshness
Freshroasted coffee gives a lively, dramatic bloom. Beans that are a few weeks old will swell and bubble less, and really old beans might barely react at all. If you’re not sure about your coffee’s roast date, noticing the bloom is a good tell (along with flavor notes on the bag or advice from your roaster).
How To Bloom Pour Over Coffee With Different Brewers
How to bloom pour over coffee in a V60
The Hario V60’s cone design and spiral ridges encourage good water flow and plenty of bloom action. After rinsing the filter, add your grounds, and pour your bloom water right into the center, spiraling slowly outward. Make sure all the coffee gets wet and wait out that classic domeshaped bloom before you continue your pour.
How to bloom pour over coffee in a Chemex
The Chemex thick filter means blooming often takes a few seconds longer than with thinner filters. Pour your bloom water in spirals or a slow zigzag, making sure all grounds are soaked, paying extra attention to the thicker paper filter’s edges. The bigger opening of the Chemex also makes it easy to see when you’ve hit all the grounds evenly.
How to bloom pour over coffee in a flatbottom dripper
With flatbottom drippers like the Kalita Wave or Fellow Stagg, pour in a slow spiral and use enough water to see the grounds dome slightly. The flat bottom helps distribute water evenly, but be careful around the edges so you don’t leave any corners dry. These brewers tend to produce a slightly milder bloom but still benefit from a gentle, patient start.
Extra Tips To Bloom Pour Over Coffee for Better Results
Keep your pouring pattern consistent
Pours that are all over the place make it harder to repeat good results. Using the same spiral or back and forth pattern every time helps dial in your best cup. Stick with what works for your gear and beans so you know what to expect.
Change only one brewing variable at a time
If you’re tweaking your method, change one thing at a time (like bloom water volume or timing). That way, you know what’s actually affecting your coffee. Too many changes at once can leave you guessing at what worked or didn’t.
Take notes so you can repeat your best cups
Keep a notebook or use an app to jot down your measurements, timing, and even feelings about each brew. When you nail a cup you really like, these notes help you repeat it. Recording things like the bloom time, water amount, and coffee freshness can save you tons of guesswork later on.
Final Thoughts on How To Bloom Pour Over Coffee
Why blooming is a small step with a big impact
It’s easy to go through the motions and miss what blooming actually does for your coffee. Spending just 30 to 45 seconds extra waiting for your coffee to bloom unlocks so much more flavor. It’s a super important detail for home brewers trying to take their daily cup up a notch.
How better blooming can improve your whole pour over routine
The best pour over routines aren’t about having the fanciest gear; they’re built on knowing what each step does and dialing it in for your own taste. Paying attention to your bloom gets you more sweetness, balance, and clean flavors. Once you’ve experienced the difference, it’s hard to go back to brewing without blooming your grounds first. Try giving blooming more focus in your morning routine and see just how much your everyday cup can improve.
Continue Learning
Best Pour Over Methods

The best pour over coffee methods don’t require expensive gear or fancy equipment. You can get by with just the essentials and make extraordinary cups of coffee
Perfecting Pour Over
Want to perfect your pour over coffee? It may seem simple, but there’s a lot that can go wrong on your path to perfection. Try this instead.