The Kalita Wave is a popular pour over coffee maker that’s built a reputation for being really friendly to beginners. If you’re new to specialty coffee or just looking for a reliable and approachable brewing method, ;earning how to use a Kalita Wave is definitely worth checking out. This guide is packed with everything you need to know, from what makes the Kalita Wave unique to step-by-step instructions, practical troubleshooting, and plenty of tips for getting café-quality coffee at home—even if you’re just starting out.
What Is A Kalita Wave And Why Is It Great For Beginners?
The Kalita Wave is a pour over coffee dripper that’s gained a lot of fans in the specialty coffee world. It’s known for its signature flat bottom design and unique waveshaped filters. This style of dripper isn’t new, but the Kalita Wave puts a fresh spin on pour over brewing, making it especially approachable for people who don’t want to stress over every detail.
What makes the Kalita Wave different from other pour over brewers
Most pour over devices, like the famous Hario V60, have a coneshaped bottom and a single, large drainage hole. The Kalita Wave changes things up with its flat bottom and three smaller drainage holes. This simple tweak helps control flow rate and makes coffee extraction more even. You don’t need to master careful spiral pouring or precise pouring speeds to get a tasty cup, so there’s less chance you’ll mess up if you’re still learning the ropes.
Why the flat bottom design is more forgiving
The flat bottom means your ground coffee sits in a wider, uniform layer. With three small holes instead of one, water soaks through at a steady, predictable pace. This leads to fewer problems with uneven extraction (like sour or bitter spots in your cup) and gives you a little extra leeway to experiment with different pouring styles or recipes without ruining your brew. That’s a big confidence booster for beginners and anyone trying a manual brewer for the first time.
Who the Kalita Wave is best for
If you’re just getting into pour over coffee and don’t want to fuss with tons of technique, the Kalita Wave feels like the safest starting point. It’s also a good fit if you:
- Have struggled with other pour over devices that always seem to produce inconsistent results
- Drink coffee solo and want a simple setup for one or two cups
- Want an easy cleaning routine with minimal gear
- Get frustrated by messy pours, channeling, or too much guesswork
Coffee nerds and old school pros like the Wave too, but its approachable nature means you don’t need years of practice to enjoy good coffee from day one. Many who have switched from cone drippers find the Kalita offers a more relaxed experience and consistent quality without fuss. The Specialty Coffee Association recommends it too.
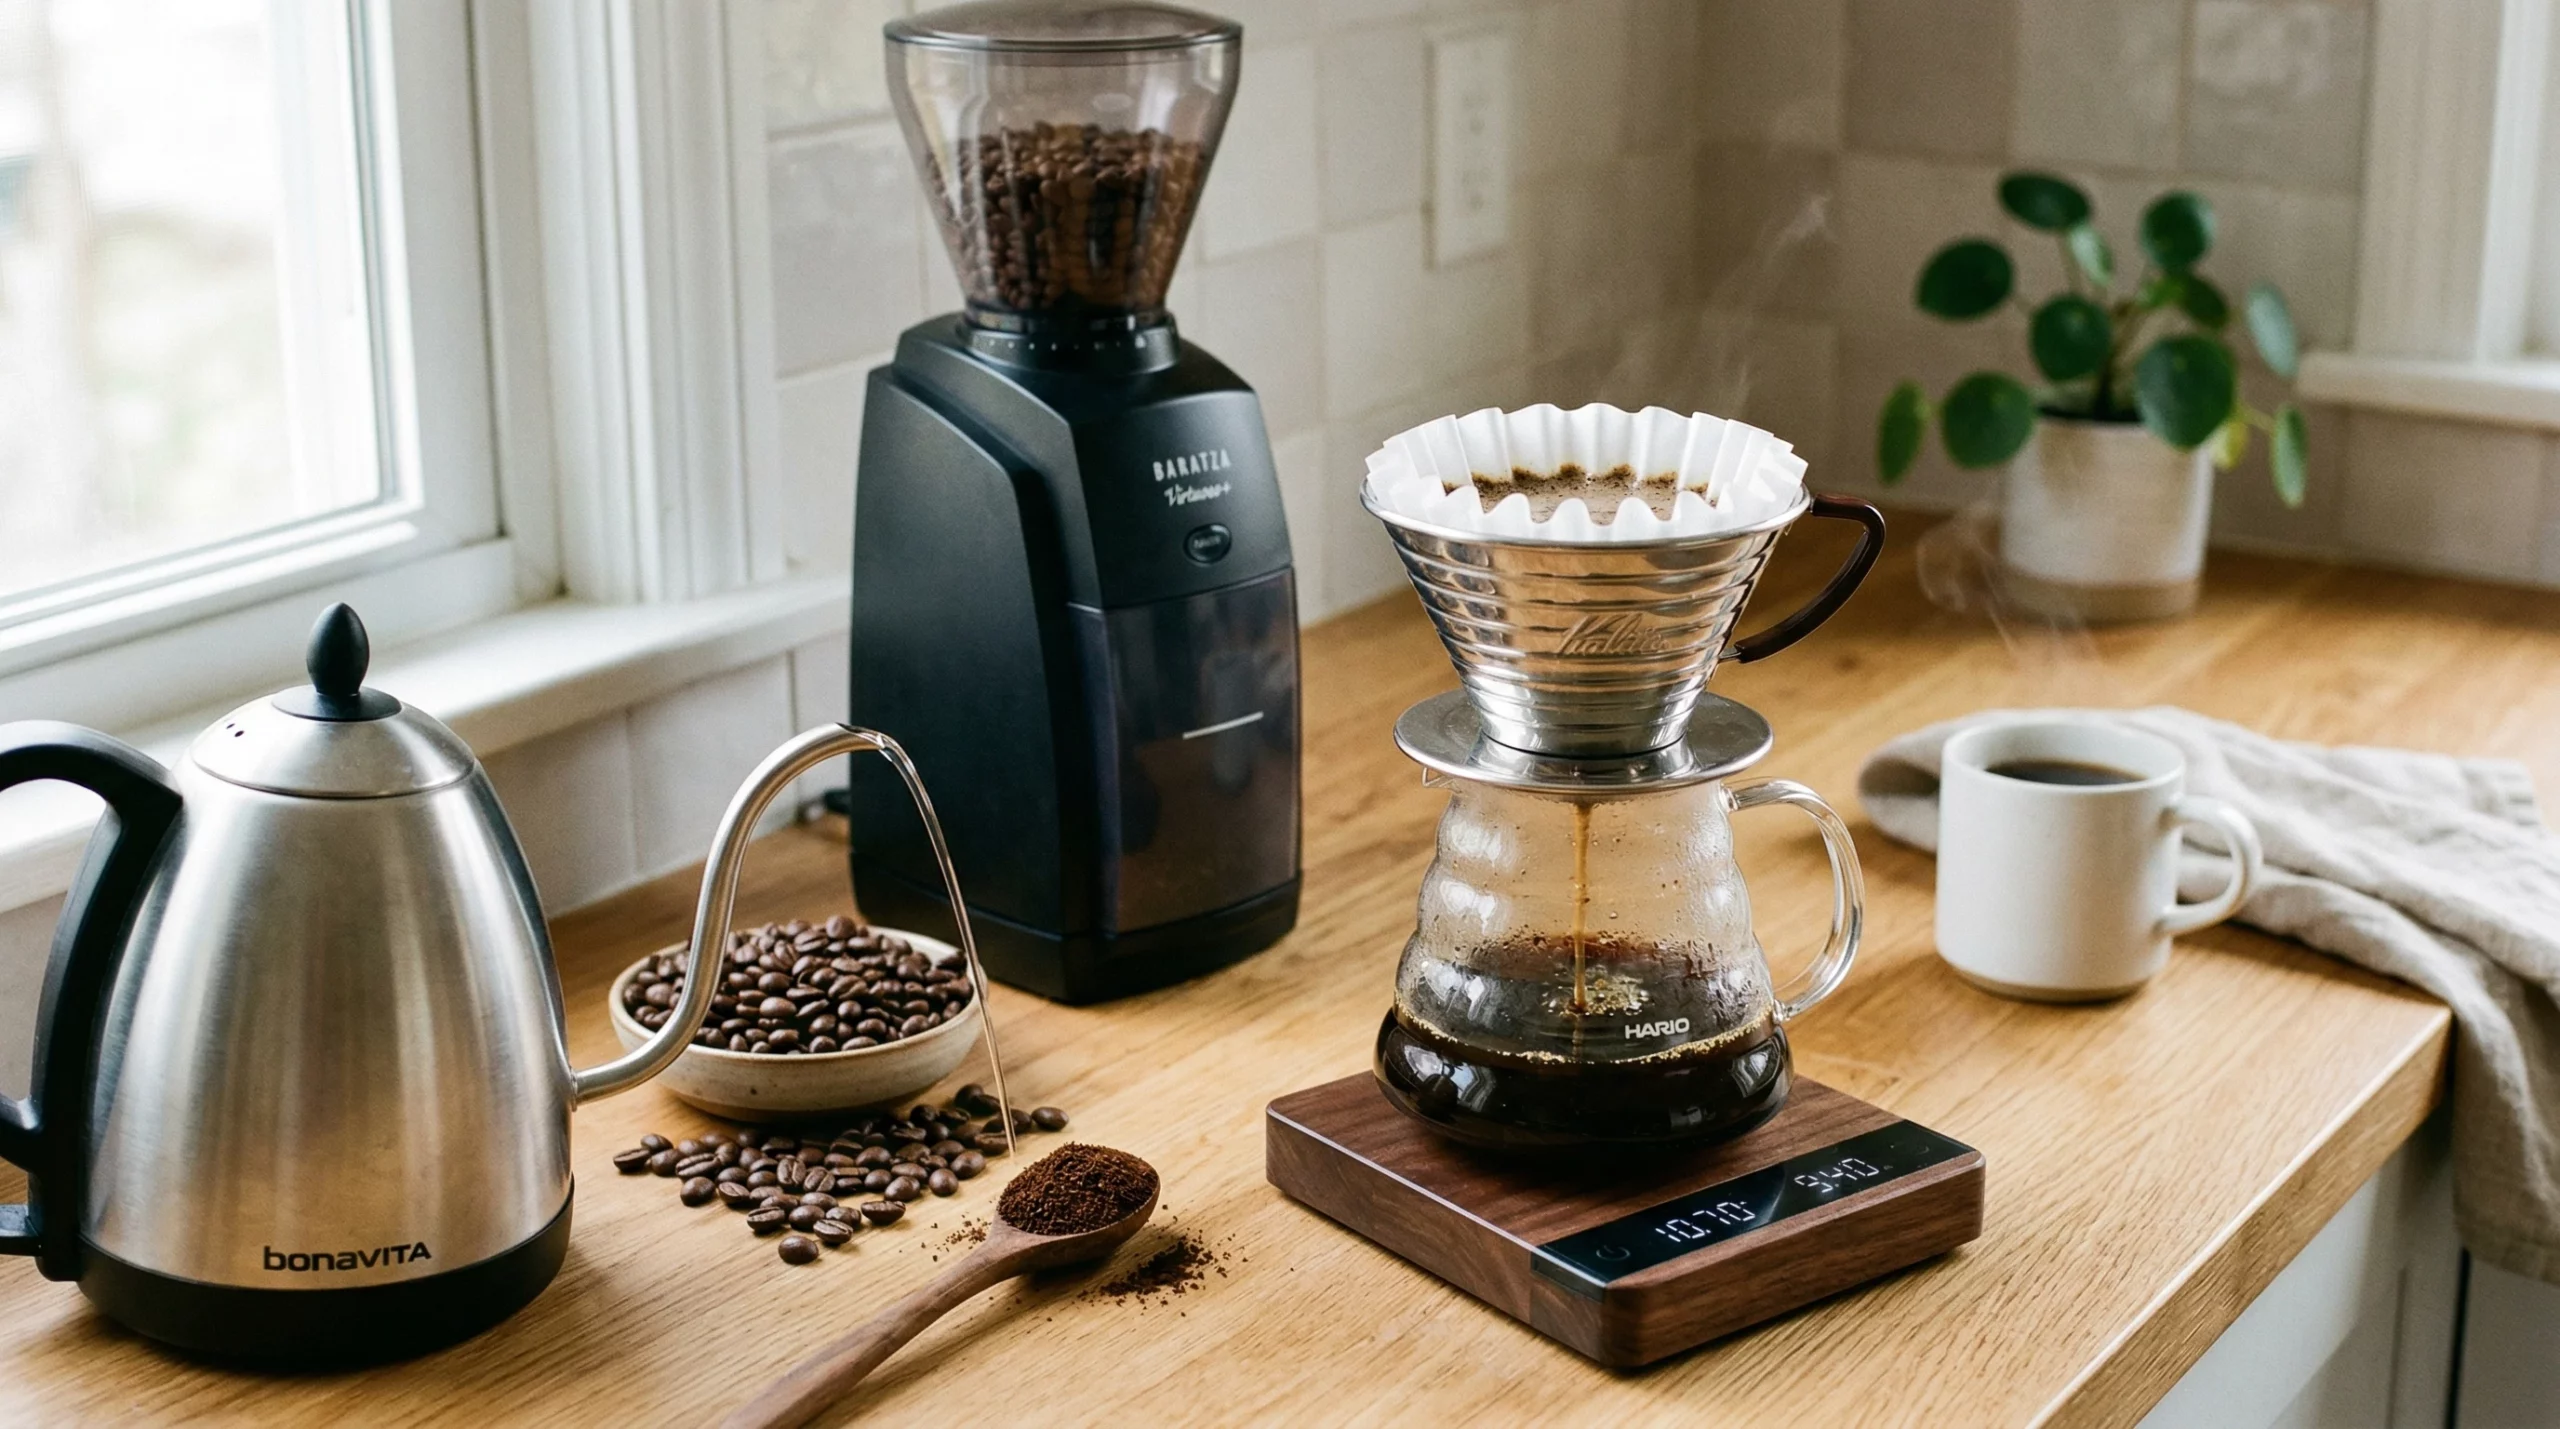
What You Need To Brew Coffee With A Kalita Wave
The basic Kalita Wave brewing equipment
Here’s what you’ll want for a classic Kalita Wave setup:
- Kalita Wave dripper in your chosen size (155 for small cups, 185 for larger mugs)
- Kalita Wave filters (the signature wavy paper ones, sized for your dripper)
- Gooseneck kettle (helps with controlled pouring, but a regular spout will work in a pinch)
- Digital scale (for weighing beans and water, making recipes repeatable and more accurate)
- Fresh coffee beans (preferably whole bean)Check out how to choose the best beans for pour over coffee for more information.
- Grinder (a burr grinder works best, but you can start with a decent hand grinder)
- Timer (phone timer works, but most digital coffee scales have timers included)
If you’re new but want to level up quickly, consider adding a thermometer for precise water temperature. Extras like a stir-stick can help level your coffee ground bed, but they are optional for starting out.
Why Kalita Wave filters matter
The iconic Kalita Wave filter isn’t just for looks. The wave-shaped sides keep the filter from sticking to the dripper, letting air flow underneath and keeping the coffee bed level. This helps the water move evenly through the grounds and gives you a repeatable brew. If you try to substitute other filters (like Melitta or V60 ones), it just won’t work as well, so stick with the real Kalita Wave filters for the best experience.
The best coffee beans for a beginner friendly brew
You don’t need to spend a fortune on rare or ultralight roasted beans. For early experiments, I like medium roasted single-origin coffees or balanced blends. These tend to be approachable and forgiving, offering a sweet, nutty, and chocolatey base, with enough character to showcase what makes manual brewing fun. Fresher is always better, so check roasted-on dates and skip supermarket coffee, which is usually stale by the time you take it home. Local roasters or reputable online shops are great places to track down fresh beans.
A Simple Kalita Wave Recipe For Beginners
Coffee to water ratio for Kalita Wave brewing
For the Kalita Wave, a great starting point is a 1:16 coffee-to-water ratio. That means you’ll use 1 gram of coffee for every 16 grams (milliliters) of water. For a typical mug (about 300g water), use 18–20g of coffee. You can adjust this ratio depending on how strong you like your brew, but that 1:16 spot is a very reliable starting point, especially for the classic Kalita Wave recipe for beginners.
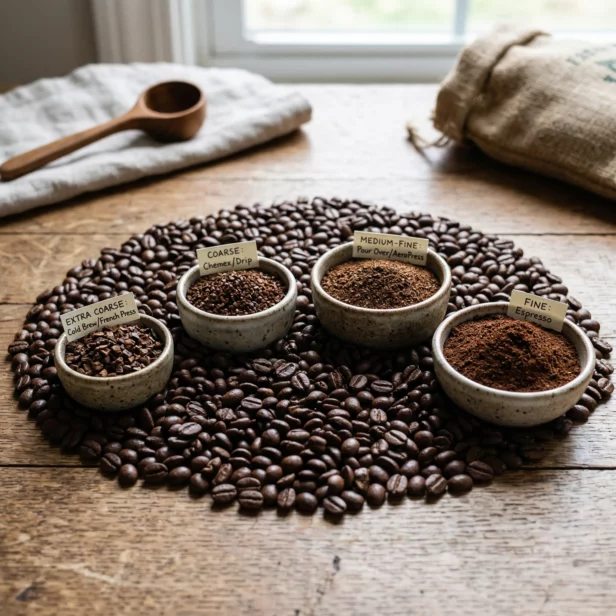
The best grind size for a Kalita Wave
The Kalita Wave likes a grind size that’s somewhere between table salt and beach sand—think “medium” on most burr grinders. Too fine, and the brew will drag on forever (with some bitterness or overextraction). Too coarse, and your coffee will end up weak. If you’re shopping for pre-ground coffee, look for “drip grind” or “pour over grind.” If you make the grind too coarse, you risk sour or under-extracted flavors. Too fine, and the brew might clog or taste harsh.
Water temperature and brew time to aim for
Use hot water just off the boil, about 200°F–205°F (93°C–96°C). That’s basically water brought to a boil and left to sit for 20–30 seconds. Brewing time should land between 2:45 and 3:30 for a single mug. If it’s much shorter or much longer, your grind size or pouring speed might need an adjustment. Using water that’s not hot enough can make your coffee taste flat, while pouring boiling water straight on the grounds could bring out bitterness.
An easy Kalita Wave recipe you can repeat

- Measure 18g of fresh coffee (for a 300g cup) and grind it medium.
- Bring water to a boil, then let it cool for 20 seconds.
- Rinse the Kalita Wave filter with hot water to preheat and remove paper taste. Discard the rinse water.
- Add your ground coffee to the filter, giving it a gentle shake to level the bed.
- Start your timer. Pour just enough water (about 40g) to wet all the coffee. Wait 30–45 seconds for the bloom.
- Continue pouring slowly in small spirals or circles, gently topping up every 10–20 seconds until you reach 300g water.
- Let the coffee draw down completely. This should take around 3 minutes total. Remove the dripper and enjoy your coffee.
This Kalita Wave pour over recipe is really easy to modify once you get comfortable. Just change one variable at a time and you’ll start to notice what works best for your taste. For those curious about making stronger or lighter coffee, tweak the coffee to water ratio a little and check how it influences the taste. If you prefer a richer cup, add a gram or two more coffee or lower water amount slightly.
How To Use A Kalita Wave Step By Step

Step 1: Rinse the filter and preheat the brewer
Place a Kalita Wave filter in the dripper. Pour hot water all the way around, soaking the filter and letting it drain into your mug or carafe. This warms everything up and removes any paper flavor from the filter. Discard the rinse water. A properly preheated brewer helps maintain stable brew temperature for better extraction.
Step 2: Add ground coffee and level the bed
Pour your medium ground coffee into the wet filter. Lift and shake the dripper gently or tap the dripper to flatten the top. A flat, even bed helps with even extraction and makes every brew more repeatable. An even coffee bed stops water from funneling through quickly in just one area.
Step 3: Bloom the coffee for even extraction
Using your scale and timer, pour about double the coffee’s weight in hot water (for 18g coffee, that’s 36–40g water). Make sure all the grounds are evenly wet. The coffee will puff up and release gas—this is called the “bloom” and just takes about 30–45 seconds. It’s a super important step for flavor and extraction.
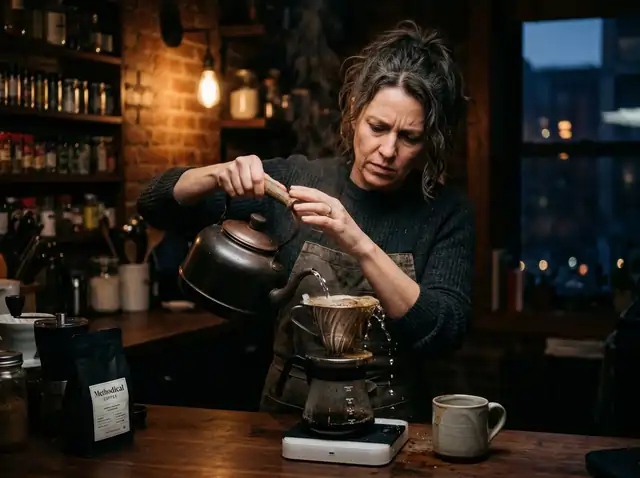
Step 4: Pour slowly and keep the water level steady
After blooming, pour gently in steady spirals or circles, trying not to touch the filter’s sides too much. Add water in small bursts, keeping the coffee bed from getting exposed or drying out. It doesn’t have to be perfect, just keep the pace slow and steady. Aim to finish all your water (for a single mug, about 300g total) by the 2 minute mark. If you see the coffee bed exposed, pour a little to keep it evenly wet.
Step 5: Let the coffee draw down and serve
Once you’ve poured all the water, let gravity do its thing and wait until the dripper is empty. This should take about 30–60 seconds more. Total brew time should hit between 2:45 and 3:30. Remove the Kalita Wave, enjoy a smell of the fresh grounds, and savor your coffee. Cleanup is quick; just dump the grounds and give the dripper a rinse.
Common Kalita Wave Mistakes And How To Avoid Them

Grinding too fine or too coarse
If your coffee tastes harsh, takes way too long to brew, or the dripper clogs, your grind might be too fine. If it’s watery or sour, it’s probably too coarse. Adjust your grind size a notch finer or coarser and test until you find a brew time around 3 minutes with vibrant, balanced flavor. If you get stuck or want to make a change, just experiment gradually and check your results.
Pouring too aggressively
Flooding the bed with water or pouring in big, splashing motions stirs up the coffee and disrupts extraction. Pour in slow, controlled circles or spirals, letting the water soak through evenly. Using a gooseneck kettle is super helpful.
Letting the brew bed become uneven
An uneven coffee bed (higher on one side, lower on the other) creates channels where water rushes through too quickly. Level your grounds before brewing with a gentle shake or tap. While pouring, try not to splash one area more than another. If you notice channeling (thin, fast streams), check how you’re pouring and level your grounds again.
Using the wrong ratio or brew time
Too much coffee can make your brew overpowering. Too little coffee, and it’ll taste thin or watered down. Aim for a 1:16 ratio and brew time (2:45–3:30), then tweak based on taste.
Changing too many variables too quickly
It’s tempting to adjust everything at once, but you’ll get lost figuring out what actually improved your brew. Only change one thing—like grind size or pour style, so you can learn which tweaks move your cup in the right direction. Keep notes on what you change for easy reference.
How To Adjust Your Kalita Wave Brew Based On Taste
What to change if your coffee tastes sour
Sour, sharp flavors usually mean under-extraction. Try grinding a little finer or letting your brew go a bit longer. Double check your water temperature to make sure it’s hot enough (close to 200°F). Sometimes, with really light roasts, giving a little longer bloom time can also help.
Under-extracted coffee is a very unpleasant surprise: Here is why your pour over coffee tastes sour and how to fix it.
What to change if your coffee tastes bitter
Bitter, dry, or harsh flavors often mean over-extraction. Use a coarser grind, reduce brew time, or try pouring a little faster. If you’re brewing too long (over 3:30), it’s probably your grind or flow rate causing the bitterness.
Bitter coffee can completely throw off your whole morning: Check out this info on why your pour over coffee tastes bitter and how to fix it.
What to change if your coffee tastes weak
Watery or bland coffee usually means not enough coffee or grounds that are too coarse. Add a little more ground coffee or tighten up your grind size. Check you’re actually hitting your recipe for water weight.
Weak pour over is pure disappointment after brewing. Here’s more info on how to make a stronger cup
How to get a sweeter and more balanced cup
Once you’ve nailed the basics, look for balance and sweetness—often found with a clean, even extraction. Fresh beans, steady pouring, and accurate ratios do most of the work. Experiment with your pouring pattern, bloom time, and even try different coffees as your skills grow. Some people adjust by swirling the dripper gently after their last pour to help even out extraction.
Looking for the best pour over coffee? Check out how to perfect your pour over coffee brewing
Why The Kalita Wave Is Considered A More Forgiving Brewer
How the flat bottom dripper helps with even extraction
The flat bottom shape spreads the grounds out and encourages the water to move through all of them at the same speed. This means fewer problems with channels, random bitter notes, or “dead zones” that happen with coneshaped drippers. Beginners report fewer failures and more consistent brews on their first attempts.
Why flow rate feels easier to manage
Three small holes instead of one big one slow down the water just enough to give you consistent results. Even if your pouring isn’t perfect, the dripper helps you out by keeping things steady and preventing water from rushing through too fast.
Why beginners often get more consistent results with it
The Kalita Wave’s design does a lot of the technical work for you. It’s really forgiving if you pour unevenly or your grind isn’t dialed in. Consistency comes easier, so your early attempts are less likely to feel discouraging. For anyone new to manual brewing, that’s a big win. If you like experimenting, this means you’ll likely make fewer bad cups and learn your preferences faster.
Tips For Brewing Better Coffee With A Kalita Wave

Use fresh beans and grind right before brewing
Freshness makes a huge difference. Try to buy coffee roasted in the last couple of weeks, and grind just before brewing. This keeps your coffee vibrant and full of flavor. Storing beans in a cool, airtight container helps keep them at their best.
Keep your pouring steady and controlled
You don’t need a ton of skill, just keep your wrist relaxed and pour slowly and evenly. If you use a gooseneck kettle, you’ll find steady pours a lot easier to control. Practice helps, but even a basic approach is enough for great results. Pouring in circles, moving from the middle out and back, can help wet all the grounds evenly.
Use filtered water for better flavor
Bad tap water or hard minerals can really mess up great beans. Use clean, filtered water that you’d want to drink on its own. You’ll notice brighter, cleaner flavors from the same coffee. Even a simple water filter pitcher can make a big difference.
Track your recipe so you can improve faster
Write down your recipe—how much coffee, water, grind setting, and how your cup turned out. That way, if you brew something amazing, you’ll be able to repeat it. If something’s off, small adjustments get you there faster. A simple coffee journal can be a gamechanger for progressing quickly.
Kalita Wave FAQ
Is the Kalita Wave better for beginners than a V60?
For most beginners, yes. The Kalita Wave is less demanding about pour technique, grind size, and speed. The V60 can make incredible coffee, but it has a steeper learning curve. If you’re worried about wasting beans or getting discouraged, the Kalita Wave is way easier to master at first.
What grind size is best for a Kalita Wave?
A medium grind, similar to regular sand or table salt, works best. If your coffee brews too quickly or tastes thin, tighten it up a notch. If it stalls or seems strong and bitter, go a little coarser. Every grinder is different, so some experimentation helps, but medium is the safest bet for starting out.
How much coffee should I use in a Kalita Wave?
Start with about 18g of coffee for a standard 300ml mug (using a Wave 185). Adjust up or down to your taste; the 1:16 coffee-to-water ratio is a dependable starting spot for almost everyone new to the brewer.
How long should a Kalita Wave brew take?
Brew time for a single cup should land between 2:45 and 3:30. If you’re finishing way faster or slower, check your grind, ratio, and pouring speed. It’s all about finding a sweet spot so the flavors have time to extract but don’t get muddled or bitter.
Final Thoughts On Learning How To Use A Kalita Wave
Start simple and focus on consistency
The biggest favor you can do for yourself as a new Kalita Wave brewer is to keep your recipes simple and repeatable. Stick with a basic coffee-to-water ratio, level your bed, and pour slowly. Practice builds confidence fast, and your coffee will only get better from there.
The Kalita Wave makes pour over coffee feel more approachable
Brew gear can feel intimidating at first, but the Kalita Wave is the perfect balance of “easy enough for beginners” and “capable of awesome cups as you get better.” Once you’re comfortable with the basics, you’ll find it’s a fun, chill, and really tasty way to brew coffee at home, one mug at a time. With a bit of patience and some trial and error, you’ll be on your way to café-quality results in your own kitchen, making morning coffee something you truly enjoy every day.
Continue Learning
Perfecting Pour Over
Want to perfect your pour over coffee? It may seem simple, but there’s a lot that can go wrong on your path to perfection. Try this instead.
10 Pour Over Mistakes
Is your pour over sour or overly bitter? You’re likely making one or more of these 10 pour over coffee brewing mistakes. Here’s how to fix them.