
How To Perfect Your Pour Over Coffee Brewing at Home
It looks simple—and it is—but getting that smooth, balanced, café-quality cup comes down to understanding a few key details and dialing them in to start perfecting your pour over.
I’ve had cups that were:
- Way too bitter
- Weirdly sour
- Or just… flat and forgettable
And every time, it came down to skipping one of the fundamentals—grind size, water temperature, pour technique, or ratio.
The good news? Once you understand the process, everything starts to click.
There’s also something calming about pour over brewing. It slows things down. It gives you control. And after a few solid cups, you’ll start looking forward to the process just as much as the coffee itself.
This guide will walk you through how to make perfect pour over coffee step by step, whether you’re a beginner or just trying to level up your home brewing.
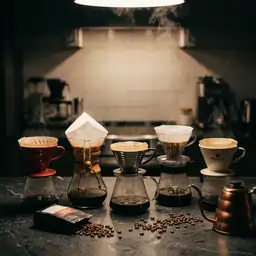
Step 1: Start With the Right Pour Over Coffee Gear
You don’t need expensive equipment—but having the right setup makes a huge difference in consistency.
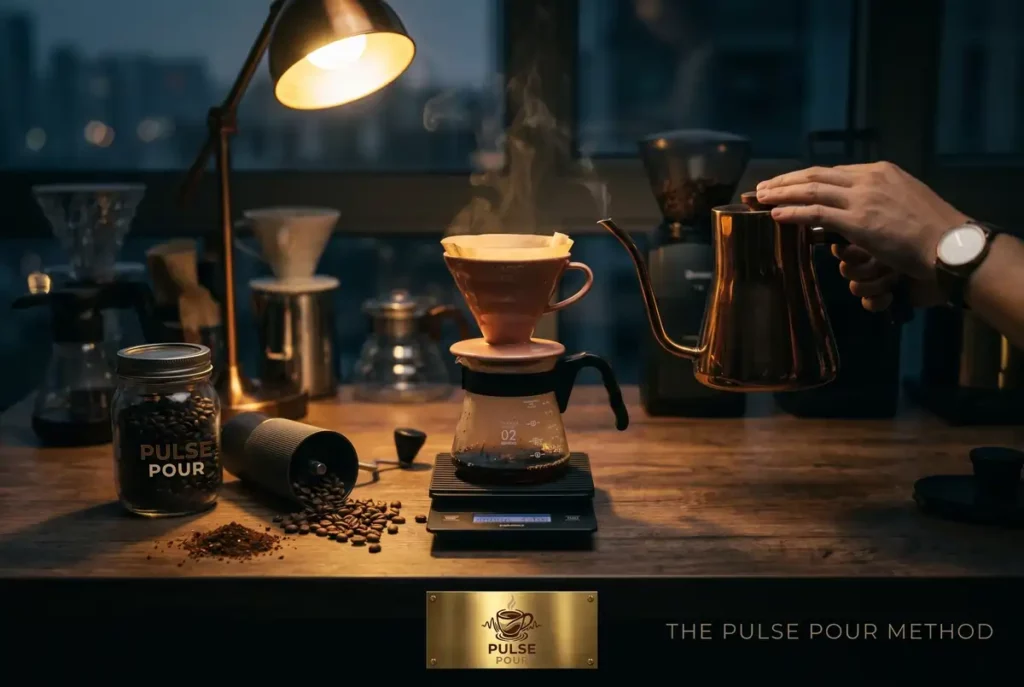
Here’s your essential pour over coffee gear list:
- Dripper (Hario V60, Chemex, Kalita Wave)
- Filters (paper or metal, matched to your dripper)
- Gooseneck kettle (for controlled pouring)
- Fresh whole coffee beans
- Burr grinder (critical for consistent grind size)
- Digital scale (for accurate coffee-to-water ratio)
- Mug or carafe
If you’re just starting out, prioritize: A good dripper + burr grinder
Everything else can come later.
This simple setup will cover all your bases, and you can always upgrade pieces over time as you dial things in and work on perfecting your pour over mugs.
One thing that’s easy to overlook, though, is keeping your gear clean. Old coffee oils and residue can build up fast and quietly affect your flavor.
If you want to keep your setup tasting fresh, I put together a quick guide on How To Clean Pour Over Coffee Makers that walks through exactly what to clean and how often.
Step 2: Use Fresh Coffee Beans (This Changes Everything)
If there’s one thing that upgrades your coffee instantly—it’s this.
Fresh, high-quality coffee beans = better flavor. Period.
Here’s what to look for:
- Roast date: 2–4 weeks is ideal
- Grind fresh before brewing
- Store in an airtight container (away from light/heat)
And don’t be afraid to experiment:
- Light roast coffee – brighter, fruity, more complex
- Medium roast coffee – balanced and smooth
- Dark roast coffee – bold, chocolatey, heavier body
Pour over brewing really shines with light to medium roasts, especially single-origin beans.
Want help choosing beans? How To Choose Coffee Beans For Pour Over
Step 3: Dial In the Perfect Grind Size
This is where most people go wrong.
For pour over coffee, you’re aiming for a Medium grind (like coarse sand)
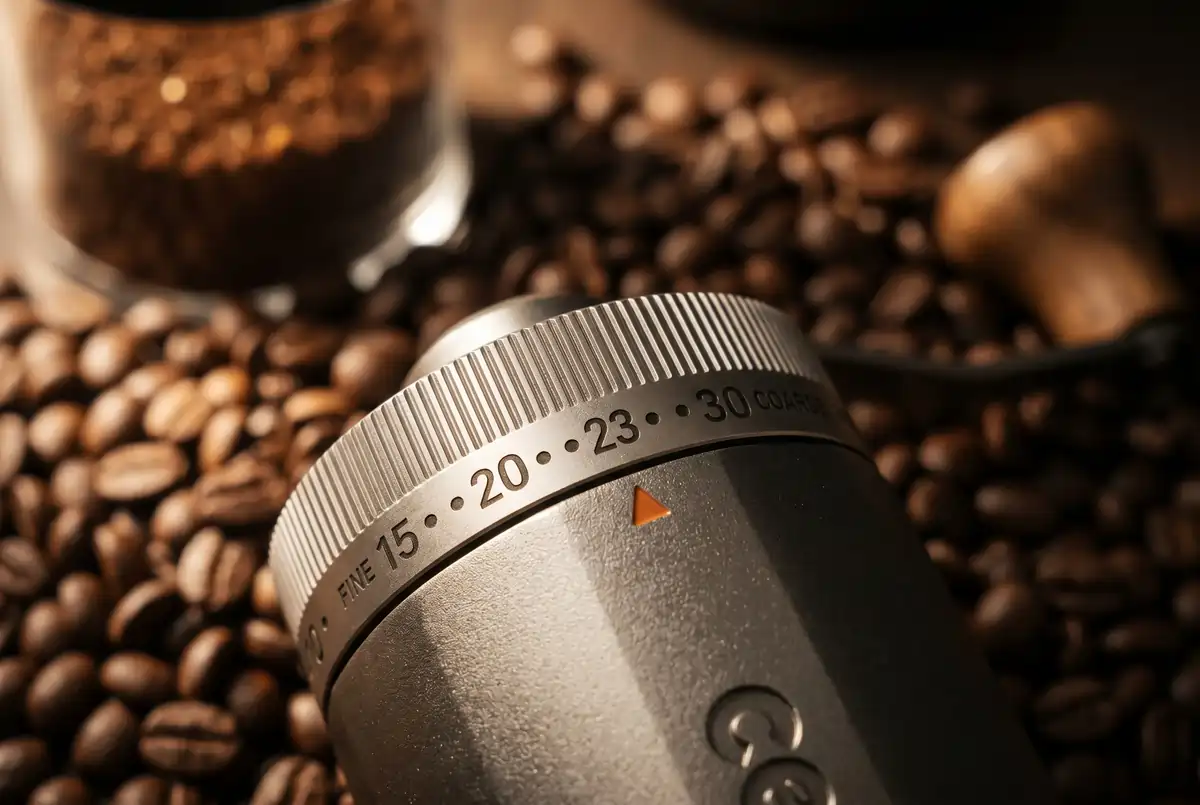
Here’s how grind size affects your brew:
- Too fine – bitter, slow extraction
- Too coarse – weak, watery coffee
A good starting point:
- Slightly finer than French press
- Slightly coarser than drip coffee
Then adjust based on taste:
- Bitter? – go coarser
- Weak/sour? – go finer
Want to go deeper on this?
How To Grind Coffee Beans For Pour Over
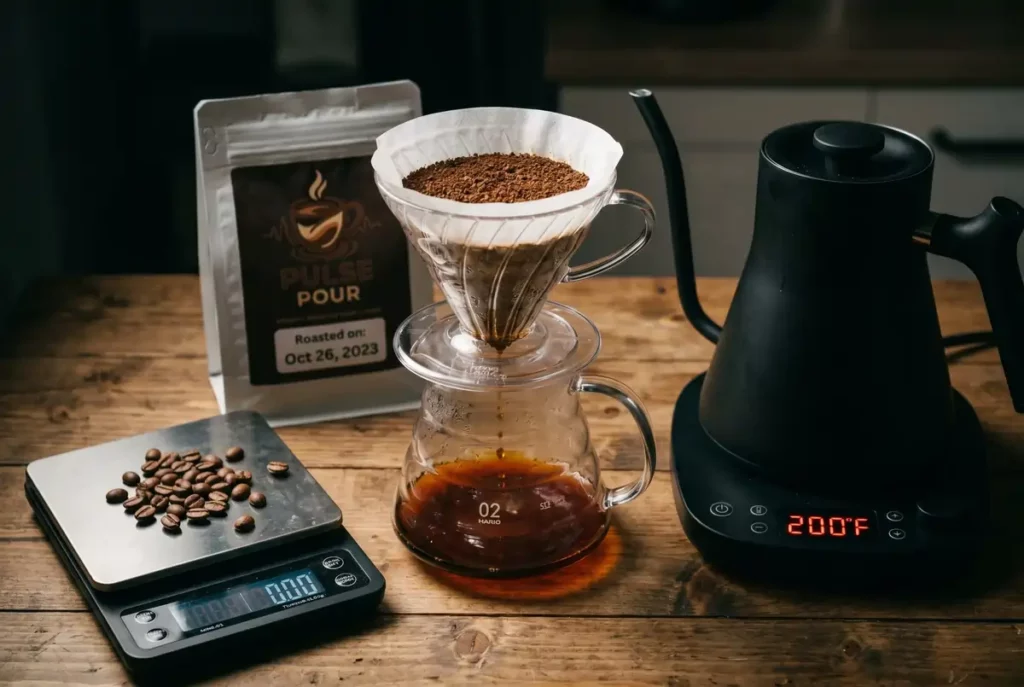
Step 4: Get Your Coffee-to-Water Ratio Right
This is the foundation of consistency.
The ideal pour over coffee ratio:
* 1:15 to 1:17 (coffee to water)
Example:
- 22g coffee → 350g water (perfect for a 12oz cup)
Want to tweak strength?
- Stronger – use more coffee
- Lighter – use more water
A scale makes this way easier and repeatable.
If you want to dive deeper into the right pour over coffee to water ratio, You can learn more in Pour Over Coffee Ratio Explained.
Step 5: Use the Right Water Temperature
Water temperature can make or break your cup.
Ideal range: 195–205°F (90–96°C)
Too hot:
- Over-extraction = bitter coffee
Too cool:
- Under-extraction = sour or flat
No thermometer?
Just:
- Boil water
- Let it sit for ~30 seconds
Done.
Water temperature plays a bigger role than most people think. Too hot, and your coffee can turn harsh and bitter. Too cool, and it comes out flat or sour.
I usually aim for water just off the boil—right in that 195–205°F range. It’s one of those small tweaks that can completely change how your coffee tastes.
To learn more about the role of water temperature in coffee extraction, read How Water Temperature Impacts Pour Over Extraction.
If you want to really dial in flavor and start picking up those subtle notes in your beans, I put together a deeper guide on How To Enhance Pour-Over Coffee Flavors And Unlock Hidden Notes In Your Beans that breaks this down even further.
Step 6: Rinse Your Filter (Don’t Skip This)
This is one of those small steps that makes a noticeable difference.
Rinse your paper filter with hot water to:
- Remove paper taste
- Preheat your dripper + mug
Then:
- Dump the rinse water
- Add your ground coffee
- Gently level the bed
Simple—but important.
Step 7: Master the Pour Over Technique
This is where the magic happens.
Here’s a simple pour over method that works every time:
1. The Bloom (First Pour)
- Add ~2x the weight of your coffee in water
- Example: 22g coffee → ~40g water
- Wait 30–45 seconds
This releases trapped gas and improves flavor extraction.
2. Slow, Controlled Pouring
- Pour in steady circular motions
- Avoid hitting the filter directly
- Keep the water level consistent
3. Timing Matters
- Total brew time: 2.5–4 minutes
Too fast?
Grind finer
Too slow?
Grind coarser
More information on brew timing and other factors can be found here in the ideal brew time for pour over coffee
Want to refine your technique even more?
Best Pour Over Brewing Methods (Compared & Explained)
Step 8: Taste, Adjust, Repeat
This is where you level up.
Every cup teaches you something.
If your coffee tastes:
- Bitter → grind coarser, cooler water, faster pour
- Sour/weak → grind finer, hotter water, more coffee
Only change one variable at a time—this is how you dial things in fast.
Common Pour Over Coffee Mistakes (Quick Fixes)
If your coffee isn’t tasting right, it’s usually one of these:
- Wrong grind size
- Incorrect ratio
- Poor pouring technique
- Bad water temperature
- Stale beans
Full breakdown here:
Pour Over Coffee Brewing Mistakes (And How To Fix Them)
Pro Tips to Take Your Pour Over to the Next Level
Once you’ve got the basics down, try this:
- Weigh everything (consistency = better results)
- Use filtered water (huge flavor difference)
- Swirl or gently stir after bloom for even extraction
- Try new beans often (this keeps it fun)
- Taste as it cools (flavors evolve over time)
Your Simple Pour Over Coffee Checklist
Before your next brew:
✔ Fresh beans
✔ Proper grind size
✔ Correct ratio
✔ Water just off boil
✔ Filter rinsed
✔ Slow, controlled pour
✔ 3–4 minute brew time
That’s it.
Final Thoughts: Make It Your Own
Pour over coffee isn’t about perfection—it’s about control, experimentation, and enjoying the process.
Once you dial in your setup, you’ll start making coffee that honestly rivals your favorite café.
And the best part?
It keeps getting better.
Next step:
What’s the first thing you’re going to tweak tomorrow—grind size, ratio, or pour technique? Let us know in the comments below!
Continue Learning
The Best Pour Over Coffee Methods
The best pour over coffee methods don’t require expensive gear or fancy equipment. You can get by with just the essentials and make extraordinary cups of coffee

How To Enhance Your Pour Over Coffee
Want better-tasting pour over coffee? Learn how to enhance pour over coffee flavors with easy tips for grind size, water temperature, bloom, and pouring method
Happy to have found this article. I have never really been a coffee drinker, but just started my first office job in my 40’s. Always thought of coffee as just a vessel for caffeine and would drink it black. Great introduction and has my interest peaked. I think the ritualistic nature will be awesome, love the preparation and being able to control the process. I can see how there is a lot to play around experiment. Great tips on how to go about it. Just curious other than going for single origin, how do you find the best quality? especially when it comes to freshness and caffeine content? Never thought the grind size and technique would have such an impact as well. Excited to get started in my new hobby!
Thanks for reading — and welcome to the rabbit hole!
It’s funny how many people start exactly where you are: drinking coffee purely for caffeine and then discovering there’s a whole craft behind it. The ritual is honestly one of my favorite parts of pour-over as well.
For finding high-quality coffee, a few simple tips help a lot:
Check the roast date – Ideally within the last 2–3 weeks. Freshness matters much more than a “best by” date.
Buy from specialty roasters – Local roasters or reputable online roasters tend to prioritize quality beans and careful roasting.
Look for tasting notes and origin info – When roasters list the farm, region, and flavor notes, it’s usually a sign they care about quality.
Buy whole beans and grind fresh – This alone will dramatically improve flavor.
As for caffeine, most arabica coffees fall in a similar range. Lighter roasts feel stronger because of flavor brightness, but caffeine differences between roasts are usually pretty small.
The fun part now is exactly what you mentioned — experimenting with grind size, brew ratios, and different origins. Small tweaks can completely change the cup.
Enjoy the process, and feel free to come back and share what beans you end up trying first!
This was such a helpful and confidence‑boosting guide. I love how you broke each step down in a way that makes the whole process feel approachable instead of intimidating. The explanations about grind size, water temperature, and pouring technique were especially eye‑opening — it’s amazing how much those small adjustments can change the flavor. I also appreciated the reminder to enjoy the ritual and tweak one thing at a time. It makes the learning process feel fun instead of overwhelming. I’m curious — which step do you think makes the biggest difference for beginners who want a more consistent cup?
Hey, thank you—that really means a lot! I’m glad it made the process feel more approachable, because that’s exactly the goal.
I’d say for beginners, the biggest difference usually comes from dialing in grind size. It has such a direct impact on how the coffee extracts, and even small tweaks can take a cup from bitter or weak to really balanced.
After that, keeping your pour consistent helps a ton with repeatability. Once those two are in place, everything else gets a lot easier to fine-tune.
And I love that you mentioned the ritual side of it—that’s honestly half the experience. Appreciate you reading!
I really enjoyed how thorough this guide is on improving pour‑over coffee at home, from choosing the right equipment and fresh beans to dialing in grind size, water temperature, and mastering your pouring technique. It makes the process feel achievable even for someone who has never brewed this way before, and the step‑by‑step breakdown helps demystify what can otherwise feel like an intimidating ritual. After reading it, I’m curious: when experimenting with different beans, how do you recommend tracking adjustments like grind size and ratio so that you can repeat your best results consistently?
Thanks so much, I’m really glad the guide made pour over feel more approachable. That’s exactly what I hope Pulse Pour helps people do.
For tracking changes, I highly recommend keeping a simple brew journal. Write down the beans you used, grind size, ratio, water temperature, brew time, and a few tasting notes for each cup. It doesn’t have to be complicated. Just having a record of what worked, what didn’t, and what flavors stood out makes it much easier to repeat your best brews and learn faster from each adjustment.
That’s also why I created a coffee journal template and flavor wheel for readers. They’re really helpful for organizing your brews and putting words to the flavors you’re tasting. You can get both by joining my newsletter at https://pulsepour.com/free-coffee-tasting-journal-template-flavor-wheel/, and they’re designed to make dialing in your pour over a whole lot easier.
Really appreciate you taking the time to leave such a thoughtful comment.
This was a really clear breakdown, especially for something that can get weirdly complicated fast. One thing I’m still trying to dial in though—how much should you actually adjust your grind size versus your pouring technique when something tastes off? Like if my coffee ends up a little sour or weak, is that usually a grind issue or am I just pouring too fast? Also curious about bloom timing—do you personally stick to a strict 30–45 seconds every time, or does that change depending on how fresh the beans are? And last thing, for someone who doesn’t have a fancy gooseneck kettle, is it still worth trying to perfect the technique, or does that tool really make that big of a difference in getting a consistent cup?
Thanks so much — I’m really glad it helped make the process feel a little less overwhelming.
Those are great questions too, because when a cup tastes off, it can definitely be tricky to tell which variable is actually causing it. In most cases, if the coffee tastes sour or weak, grind size is usually the first thing I’d look at before pouring technique. A grind that’s too coarse often leads to under-extraction, which can make the cup taste thin, sharp, or a little hollow. Pouring too fast can contribute too, but grind size tends to have the bigger impact.
For bloom timing, I usually treat 30–45 seconds as a solid guideline rather than a strict rule every single time. Fresher beans often release more gas, so they may benefit from a slightly longer bloom, while older beans sometimes need less. I mostly watch for the bloom to settle down rather than forcing the exact same timing every brew.
And yes, it’s still absolutely worth practicing your technique even without a gooseneck kettle. A gooseneck does help with control and consistency, but it is not what makes or breaks good pour-over. You can still make a really enjoyable cup with a regular kettle by pouring slowly and staying as steady as you can. The main thing is controlling the flow as much as possible, not having perfect gear right away.
Really appreciate this comment — these are exactly the kinds of small details that help people improve without feeling like they need to overcomplicate everything.